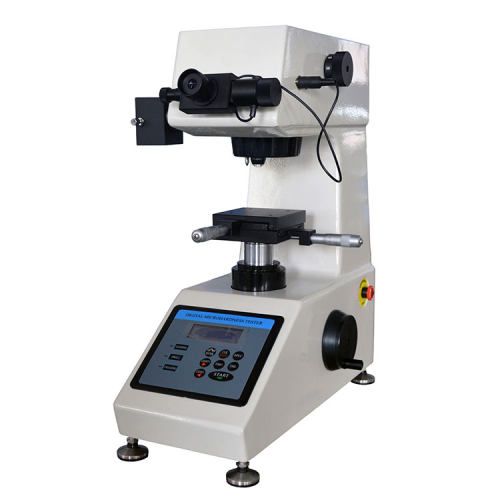
Digital Vickers hardness testers are precision instruments used to determine the hardness of materials. To achieve accurate and reliable results, meticulous preparation, controlled testing conditions, and proper data analysis are essential. Scopelab lists the critical steps involved in preparing for a hardness test, implementing measures to ensure accurate results, and controlling the environmental factors that can influence test outcomes. By following these guidelines, users can optimize the performance of their digital Vickers hardness testers and enhance the overall quality of their hardness measurements.
Preparation before Using a Digital Vickers Hardness Tester
Before operating a digital Vickers hardness tester, it is essential to undertake several preparatory steps to ensure accurate and reliable results. These steps include:
- Equipment Inspection: Conduct a thorough inspection of the hardness tester to verify that all components are in good working condition and free from any signs of wear or damage. Pay particular attention to the indenter, objective lens, and any other critical components. Additionally, check the calibration status of the instrument to ensure that it is within acceptable tolerances.
- Surface Cleaning: Clean the surface of the hardness tester, including the stage and scale, using a soft, lint-free cloth to remove any dust, debris, or fingerprints that could interfere with measurements.
- Parameter Setup: Select the appropriate indenter and test load based on the characteristics of the material being tested. Ensure that the hardness tester is configured to meet the specific requirements of the test, such as dwell time and indentation depth.
- Sample Preparation: The test specimen should have a smooth, clean, and flat surface free from any contaminants such as oil, grease, or scale. If necessary, prepare the sample by grinding or polishing to achieve the desired surface finish.
- Environmental Conditions: Maintain a stable testing environment with appropriate temperature and humidity levels. Extreme temperature fluctuations or high humidity can adversely affect the performance of the hardness tester and the accuracy of the results.
- Safety Precautions: Prior to operation, wear appropriate personal protective equipment (PPE), such as safety glasses and gloves. Inspect the safety interlocks and electrical connections to ensure they are functioning correctly.
- Calibration: If required, calibrate the hardness tester using standardized hardness blocks to verify the accuracy of the measurements. Follow the manufacturer’s calibration procedures to ensure compliance with relevant standards.
- Familiarization with Operating Procedures: Carefully read and understand the operating manual to become familiar with the correct procedures for operating the hardness tester. This includes sample loading, test parameter selection, and data acquisition.
Additional Considerations
- Specimen Size and Shape: Ensure that the specimen is large enough to accommodate the indentation without edge effects.
- Indentation Spacing: Maintain sufficient spacing between indentations to avoid interference.
- Repeatability: Perform multiple indentations on the same specimen to assess the repeatability of the measurements.
- Data Analysis: Use appropriate software to analyze the hardness data and generate reports.
By adhering to these guidelines, you can maximize the accuracy and reliability of your hardness testing and contribute to the overall quality of your products.
Ensuring Accurate Results with a Digital Vickers Hardness Tester
To guarantee the accuracy of test results obtained from a digital Vickers hardness tester, several crucial steps must be taken:
1. Hardware Preparation and Calibration
- Appropriate Indenter and Load: Select an indenter and test load that are suitable for the hardness range of the material being tested.
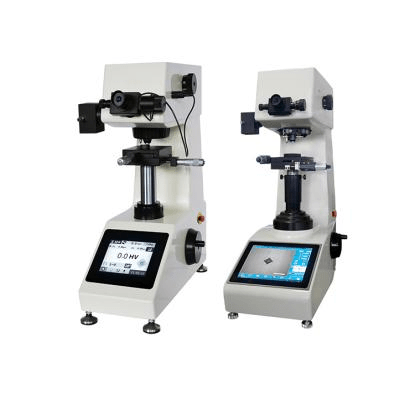
- High-Precision Measurement System: Utilize a high-precision optical measurement system and a precise coordinate stage to enhance test accuracy.
- Regular Calibration: Conduct regular calibrations using standardized hardness blocks to verify the accuracy and repeatability of the hardness tester.
2. Environmental Conditions and Operational Standards
- Specimen Preparation: Prepare the test specimen to have a smooth, clean, and flat surface, free from any contaminants.
- Stable Testing Environment: Maintain a stable testing environment, free from vibrations or external disturbances.
- Clear Indentation: Ensure that the test stage is level and the indentation is clear and well-defined, with all four corners clearly visible for accurate measurement.
3. Adherence to Correct Testing Procedures
- Follow Manufacturer’s Instructions: Strictly adhere to the operating manual provided by the manufacturer, including the correct testing sequence and parameter settings.
- Customized Settings: Implement personalized settings based on specific testing requirements to enhance accuracy and reliability.
4. Data Processing and Validation
- Automated Measurement: Utilize automated measurement and image analysis software to improve reading accuracy and reduce human error.
- Multiple Tests: Conduct multiple tests on the same specimen to obtain an average hardness value and improve the representativeness and reliability of the results.
- Result Verification: Compare the test results with expected hardness ranges and previous test data to verify accuracy.
5. Maintenance and Troubleshooting
- Regular Maintenance: Perform regular maintenance and cleaning of the hardware to maintain optimal performance.
- Troubleshooting: Address any abnormal readings or operational issues promptly. Consult the manufacturer’s technical support if necessary.
Additional Considerations
- Specimen Size: Ensure the specimen is sufficiently large to avoid edge effects.
- Indentation Spacing: Maintain adequate spacing between indentations to prevent interference.
- Environmental Factors: Consider the impact of temperature, humidity, and other environmental factors on test results.
By following these guidelines, you can significantly enhance the accuracy and reliability of the results obtained from your digital Vickers hardness tester. Regular maintenance, proper calibration, and adherence to standardized testing procedures are essential for ensuring the long-term performance of the equipment and the quality of the data generated.
Temperature and Humidity Control for Digital Vickers Hardness Testers
Temperature and humidity control are critical factors that can significantly impact the accuracy and reliability of hardness testing results obtained from a digital Vickers hardness tester.
Temperature Control
To control the temperature of the testing environment for a digital Vickers hardness tester, specialized high and low-temperature testing systems, such as the HVC-800 model, can be employed. These systems are designed to perform hardness tests within a wide temperature range, typically from -160°C to 600°C, with a temperature accuracy of ±1°C. Such systems typically include a temperature control unit that can precisely regulate and maintain the temperature of the testing environment, ensuring the accuracy of hardness measurements.
Humidity Control
While specific humidity control measures for digital Vickers hardness testers may not be explicitly mentioned in search results, it is generally recommended to maintain a suitable relative humidity level, typically between 30% and 80%, within the testing laboratory. This can be achieved through the use of air conditioning systems or dehumidifiers. Additionally, ensuring proper ventilation can help regulate humidity levels and dissipate heat, reducing the impact of humidity on test results.
Practical Considerations
To ensure accurate and repeatable test results, it is essential to:
- Controlled Environment: Place the hardness tester in a temperature and humidity-controlled environment.
- Regular Monitoring: Monitor environmental conditions regularly to ensure they remain within acceptable limits.
- Specialized Equipment: For testing under specific humidity conditions, consider using temperature and humidity chambers.
Conclusion
Accurate hardness testing is crucial for various industries, and the digital Vickers hardness tester is a valuable tool for achieving precise results. By diligently following the preparation steps, implementing proper testing procedures, and maintaining optimal environmental conditions, users can significantly enhance the reliability and accuracy of their hardness measurements. Continuous calibration, regular maintenance, and staying updated with the latest advancements in hardness testing technology are essential for ensuring long-term performance and data integrity. It leads to improved product quality and overall process efficiency. For more information about hardness tester, please contact the hardness tester expert Scopelab.